Using
MessageWhiz on 

Step 1
Step One: How to create a campaign
Begin by creating a messaging workflow, which Customer.io automatically sends in response to user behavior.
1. Log into your Customer.io account.
2. Click on the Campaigns tab.
3. Click Create Campaign.
4. Enter a campaign name and click Create Campaign.

5. Select the They meet conditions trigger. Click on the trigger condition that meets the needs of your campaign.
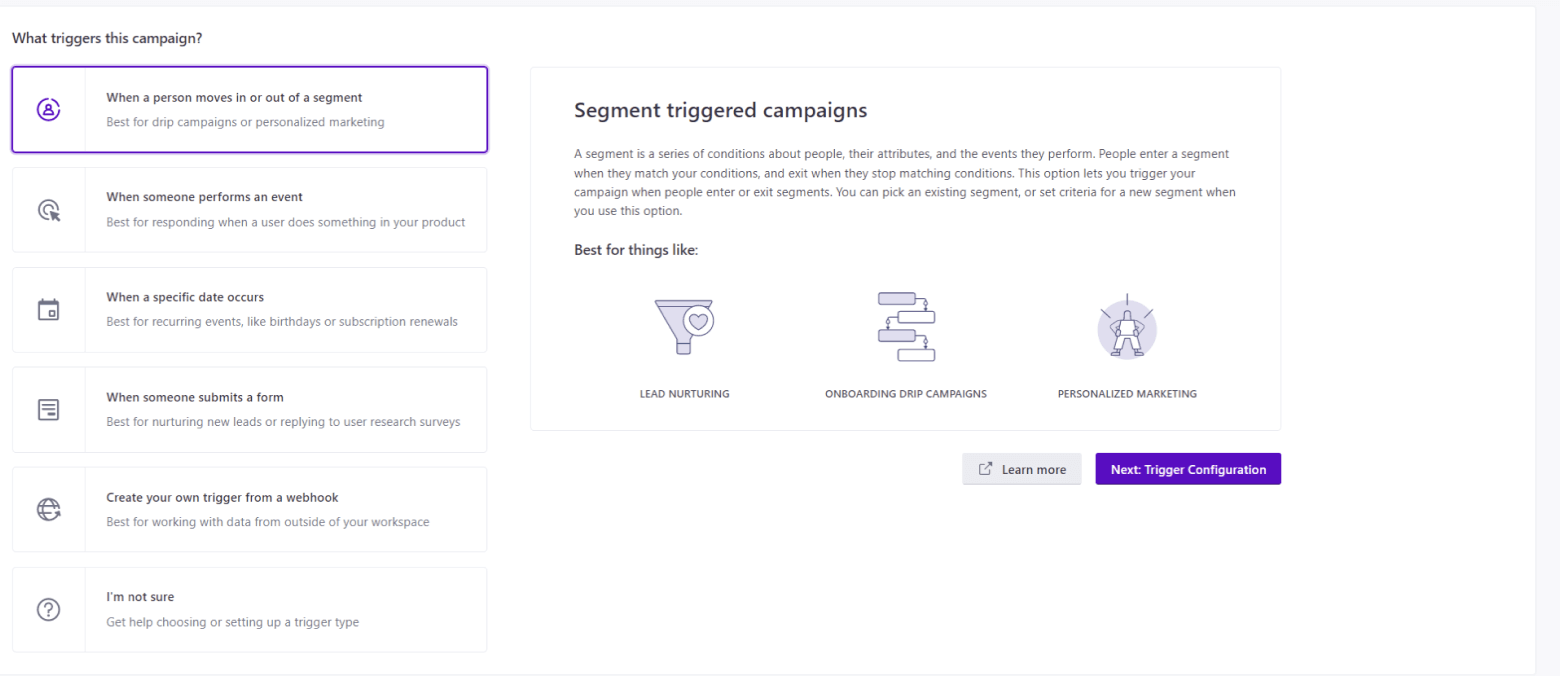
6. Choose “Send and receive data” and drag it to the middle of your workflow.

7. Select the dropped block.
8. Click Add Request.
Set the method to POST
URL to https://sms.mmdsmart.com/sms
Keep the header Content type – application JSON.
Set the body to one of the following JSON:
If you are using MessageWhiz’s shorten_url feature, use the following request:
{
"api_key": "apikey",
"to": “{{ customer.phone | remove_first: "+" }}”,
"from": "sender",
"text": "Hello {{customer.first_name}} , it's a
message you requested {%raw%} {{link:id}} {%endraw%}"
}

{
"api_key": "apikey",
"to": “{{ customer.phone | remove_first: "+" }}”,
"from": "sender",
"text": "Hello {{customer.first_name}} , it's a
message you requested {%raw%} {{link:id}} {%endraw%}"
}
Copy code
If you do not need the shorten_url feature, please use the following request:
{
"api_key": "apikey",
"to": "{{ customer.phone | remove_first: '+' }}",
"from": "sender",
"text": "Hello {{customer.first_name}},\nIt's a message you requested"
}

{
"api_key": "apikey",
"to": “{{ customer.phone | remove_first: "+" }}”,
"from": "sender",
"text": "Hello {{customer.first_name}} , it's a message you requested"
}
Copy code

The following optional parameters may be included into request:
client_ref - custom parameter up to 160 characters, will be present in response for Single creation, DLR to Webhook, and callback
callback - the URL of callback to which DLR statuses per single message will be sent
Callback will contain the following parameters:
message_id – the ID of the message
sender – the Sender name that was used in message
recipient – phone number of the recipient
content – text of the message that the recipient received
state – the ID of DLR status of message
status – the DLR status of single message. Possible DLR statuses (with their ids):
1 - ENROUTE
2 -DELIVRD
3 - EXPIRED
4 - DELETED
5 - UNDELIV
6 - ACCEPTD
7 - UNKNOWN
8 - REJECTD
9 - FAILED
client_ref – custom parameter up to 160 characters, will be present in response for Single creation, DLR to Webhook, and callback
timestamp – time of sending message
parts_count – the amount of PDUs in the message
price – the cost of single message
parts – information about every PDU, may have such fields:
pdu_id – ID of the message part
encoding – text encoding used for the message part
content – text of the message part
status DLR status code for the message part
9. Click Save Changes and Done.
10. Set the Sending Behavior to Send Automatically. Click Save.
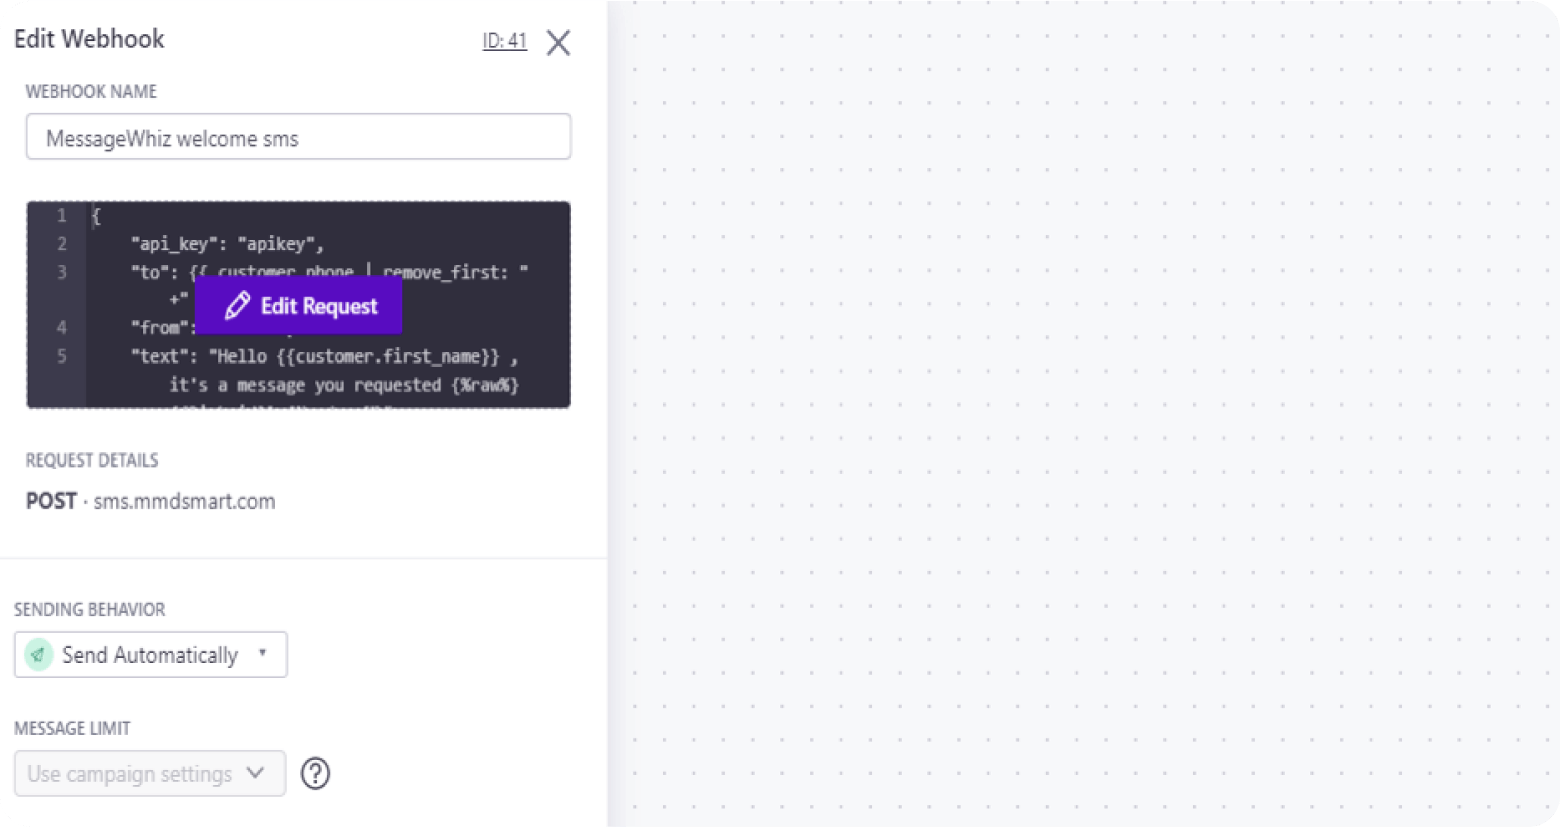
11. Click Next and set all the following parameters you have defined.
Congratulations, you have created a new campaign that sends an SMS to every new sign up!

Step 2
Step Two: Create an Automated Broadcast Message
MessageWhiz enables you to automate sending a broadcast message that is triggered by an API to large groups of people.
1. Enter a broadcast name, select the Messages triggered via API type and click Create Broadcast.

2. Under the Define manually section, click Add attribute condition, type in a phone, select exists, and click the checkmark button. Click Save & Next.
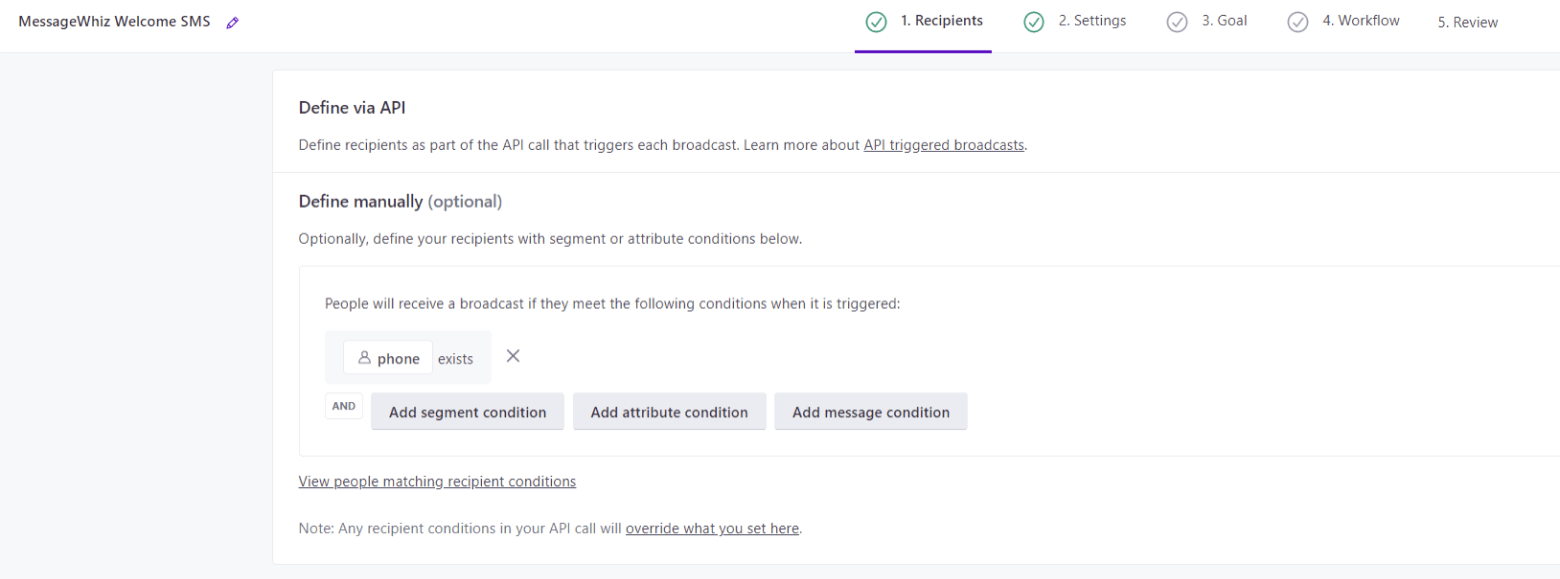
3. Choose the “Send and receive data” and drag it to the middle of your workflow.

4. Select the dropped block.
5. Click Add Request.
Set the method to POST
URL to “https://sms.mmdsmart.com/sms”
Keep the header Content type – application JSON.
Set the body to one of the following JSON:
In case if you are using MessageWhiz’s shorten_url feature, use the following request:
{
"api_key": "apikey",
"to": “{{ customer.phone | remove_first: "+" }}”,
"from": "sender",
"text": "Hello {{customer.first_name}} , it's a
message you requested {%raw%} {{link:id}} {%endraw%}"
}

{
"api_key": "apikey",
"to": “{{ customer.phone | remove_first: "+" }}”,
"from": "sender",
"text": "Hello {{customer.first_name}} , it's a
message you requested {%raw%} {{link:id}} {%endraw%}"
}
Copy code
If you don’t need the shorten_url feature, please use the following request:
{
"api_key": "apikey",
"to": “{{ customer.phone | remove_first: "+" }}”,
"from": "sender",
"text": "Hello {{customer.first_name}} , it's a
message you requested"
}

{
"api_key": "apikey",
"to": “{{ customer.phone | remove_first: "+" }}”,
"from": "sender",
"text": "Hello {{customer.first_name}} , it's a
message you requested"
}
Copy code
There are some optional parameters which may be included into request, such as :
client_ref - custom parameter up to 160 characters, will be present in response for Single creation, DLR to Webhook and callback
callback - the URL of callback to which DLR statuses per single message will be sent
Callback will contain the following parameters:
message_id – the ID of the message
sender – the Sender name that was used in message
recipient – phone number of the recipient
content – text of the message that the recipient received
state – the ID of DLR status of message
status - the DLR status of single message. Possible DLR statuses (with their ids):
1 - ENROUTE
2 -DELIVRD
3 - EXPIRED
4 - DELETED
5 - UNDELIV
6 - ACCEPTD
7 - UNKNOWN
8 - REJECTD
9 - FAILED
6. Click Save Changes and Done.

7. Set the Sending behavior to Send Automatically. Click Save.

Step 3
Step Three: Try it out!
8. Click Next.
9. Click Activate Broadcast.
Congratulations, you have created a new broadcast workflow that sends an SMS to all customers with a mobile number.


